Teams Training Videos
A series of helpful training videos lead by Microsoft certified trainers are available at the Office 365 Communication Hub page managed by IT@JH. They can be helpful to orient you to the application's features:
A series of helpful training videos lead by Microsoft certified trainers are available at the Office 365 Communication Hub page managed by IT@JH. They can be helpful to orient you to the application's features:

Microsoft Teams is a online collaboration platform made available though JHU's Office 365 license. It allows users to chat, hold discussions, share links, images, and documents for collaborative editing. In some ways it is similar to Slack but has built-in capability to edit files live with your colleagues through its integration with Office 365 online applications.
The CTEI can assist faculty at KSAS and WSE schools with strategies for implementing Teams with their course. For help with techinical issues with Teams, please contact the IT Help Desk, https://it.johnshopkins.edu/it-services/solution-center, and click "Report a problem" for assistance.
For updates on the status of the Teams service, please visit the JHU Office 365 Communication Hub page for Teams.
To access Teams, you can either:
You can create a Team Class Site that is linked to your course in Canvas. This will provide a convenient link for you and your studnts to access your Teams Class Site. It will also will sync the Site's membership with your course's roster in Canvas.
To create a Teams Class Site, you will need to enable the "Microsoft Teams" 3rd party tool (LTI). This can be done by going to the Navigation tab in Course Settings, locating the "Microsoft Teams classes" item in the bottom list, and either clicking on the 'triple dot' button and choosing Enable or dragging that item up into the top list of enabled tools.
Once the "Microsoft Teams class" item appears in your Course Menu, you can click it to begin the site creation process (it may take a few minutes). It may prompt you to enable the Microsoft Sync integration feature before the site gets created. If so, please follow the directions found here: https://canvas.jhu.edu/faculty-resources/third-party-tools/microsoft-teams-classes/#Use
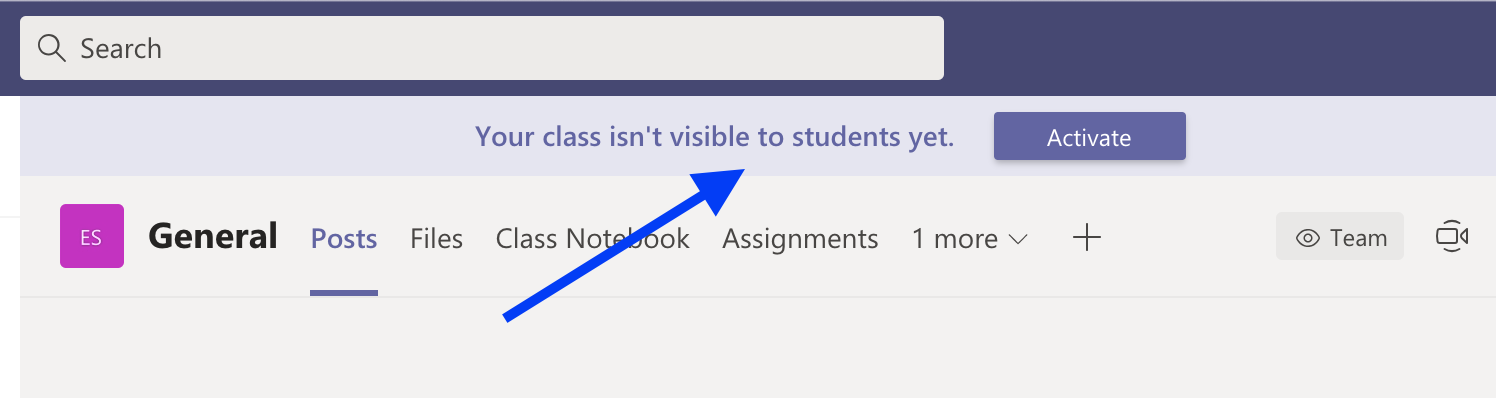 To start using your Teams Class site, it is recommended to set up your Channels and think through how you will use Teams in your course, before Activating your Teams Class site. Once you have the site ready, you can click on the Activate button found at the top of your Class site. Students will then be notified about the site with information about how to access it.
When a Canvas course is enabled for a Teams Class Site, a single site will be created for the course it is enabled in. This means, if you chose to have your course's sections merged into one Canvas course, the resulting Teams Class Site will have the enrollments for each of those merged sections in that site.
If you want to maintain separate communications to each of your merged sections in that Teams Class Site, you can create Private Channels for each section and manage the membership of each of those channels. For more information on Private Channels in Teams, please visit the following page: Private channels in Microsoft Teams - Microsoft Teams | Microsoft Docs
NOTE: The sync feature won't add newly added students to the appropriate Private Channel, you would have to do that manually.
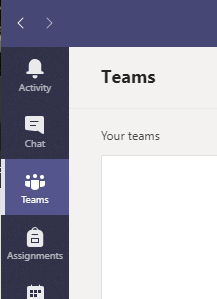 Once you enter the Teams site, click on the Teams tab on the left.
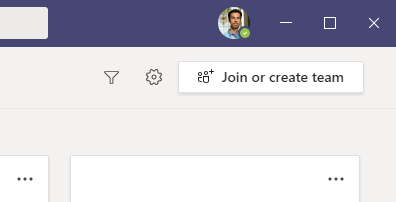 Then on the top right of the window, click "Join or create team". You should have the option to choose a "Class" template for your Team
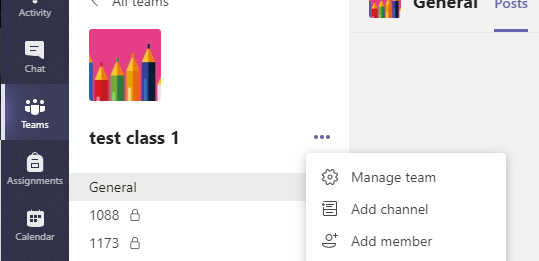 When in your Team, click the "triple dots" to reveal the Team settings menu. Then chose "Add Member".
 If you chose the "Class" template, the dialog box will have two tabs, one for adding Students, and one for Teachers. You can use a JHED ID to find the correct person.
While Teams can be accessed from a web browser, you also have the option to download the Microsoft Teams application. Microsoft offers a desktop client as well as mobile apps. Downloading the desktop client provides a more robust experience with helpful notifications of activity (so that you don't miss a thing) and has more video conferencing features.
It is a good idea to introduce how you are using Teams in your course to your students. For instance, you can inform them about; how you organized the Teams Class Site into Channels, whether or not you are holding synchronous session using the meeting features, how conversations should be conducted, whether or not they will have assignments in the Teams Class Site, etc.
For students who haven't used Teams yet in class or need a refresher, you can share the following student-oriented guide from Microsoft, which includes short videos.
Student help center: True Teamwork with Microsoft Teams
NOTE: Keep in mind that you may not be using all of the features of Teams and it would helpful to tell students which ones you are using.
With each Teams site, you have the option to add additional functionality called "Apps". One app that can be particularly useful for instructors is the "Insight" app. This app is created by Microsoft to present activity and usage data to the site owners (not the students). When enabled, it will appear on as a tab in the General channel. Its use can give you insight on student engagement, attendance, and performance on assignments.
For more information on the app and how to enable it, please visit the following Educator Guide: https://support.microsoft.com/en-us/office/educator-s-guide-to-insights-in-microsoft-teams-27b56255-90c0-47aa-bac3-1c9f50157181
Microsoft has been adding new features to the virtual meeting functionality to make virtual class meetings or meetings with colleagues easier. Here are a few of the new features you will gain with the new meeting experience:
Once a site is created, it gets automatically set to expire one year from its creation. You may get a notification asking you to renew the site 30 days from its expiration date. You can simply renew for another year if you intend to keep using it. For more infomation on the expiration and what happens if you don't renew, please visit the following IT@JH page about this policy: https://livejohnshopkins.sharepoint.com/sites/Office365Hub/SitePages/Expiration-Policy.aspx