Panopto sub-page navigation:
Getting Started with Panopto
![]()
Panopto is a cloud-based video sharing platform that captures, stores, and shares audio, video, and screen content. While traditionally categorized as a lecture-capture service, Panopto can do much more. Panopto simplifies the complex task of recording lectures and presenting pre-recorded lecture information. The most common use cases for Panopto are Lecture Recording, Pre-Class Videos, and supplemental material. Our Panopto license allows for unlimited recordings and unlimited media uploads of any file size. Videos stored in Panopto do not count against the course size quota in Canvas, even when accessed via Canvas.
NOTE: This page is intended to help Arts & Sciences/Engineering faculty at JHU setup the Panopto video management platform for use in classes on the Homewood Campus. This is not a comprehensive guide on how to use Panopto but a set of instructions on how to get started.
Canvas Integration
The easiest way to use Panopto is when it is integrated with Canvas. When used in this way, a folder is created for each Canvas class that uses Panopto. Instructors and TAs have rights to record, edit, and delete in this folder, and students have rights to view the contents. The process of linking Panopto and Canvas is called provisioning.
The following instructions are for Homewood Faculty who teach in Arts & Sciences/Engineering. For more information about using Panopto in a different school, contact your school's Teaching and Learning Center.
Provisioning your Canvas course to use Panopto
Step 1:
Login to Canvas (https://canvas.jhu.edu/) and select your course
Step 2:
If you see a "Panopto Video" link on your Course Menu, skip to Step 3.
If you don't see this link, please do the following to add it:
- From the Course Menu, choose Settings.
- Then, click on the Navigation tab.
- In the Navigation page, the bottom list are the Disabled tools. Click on the Triple Dot button for the Panopto Video item, then click "Enable" and click "Save". It will then appear in the Enabled list at the top.
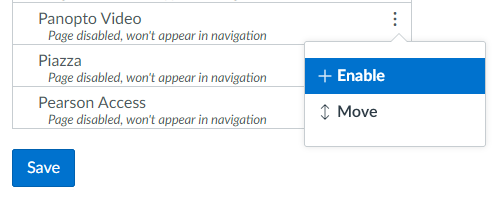
NOTE: Once "Panopto Video" is in the Enabled listing, it will be visible for your students.
NOTE: You can now drag it to where you want it to appear in the list, or click the triple dot button and click Move to reposition the item.
Step 3:
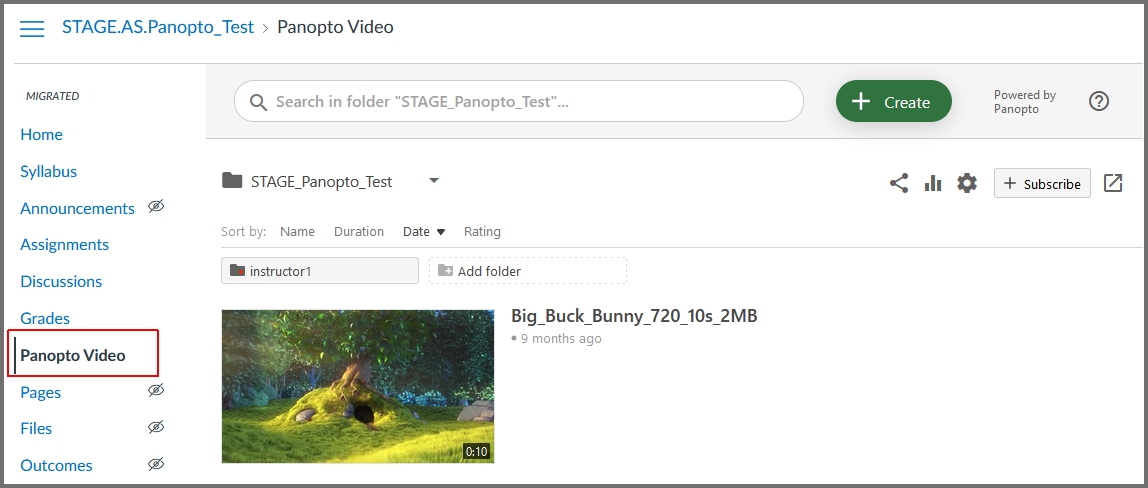
Click on the "Panopto Video" link from your course's Course Menu:
Your course is now provisioned!
Next Steps
Now that Panopto is enabled in your Canvas course, learn more about how Panopto and Canvas work together.
If you're ready to start creating content, learn more about making your first recording.